Contributed by Ravi Lachhman

Drone Architecture
Drone has a Server to Runner model. A Server orchestrates the runners which perform the tasks.
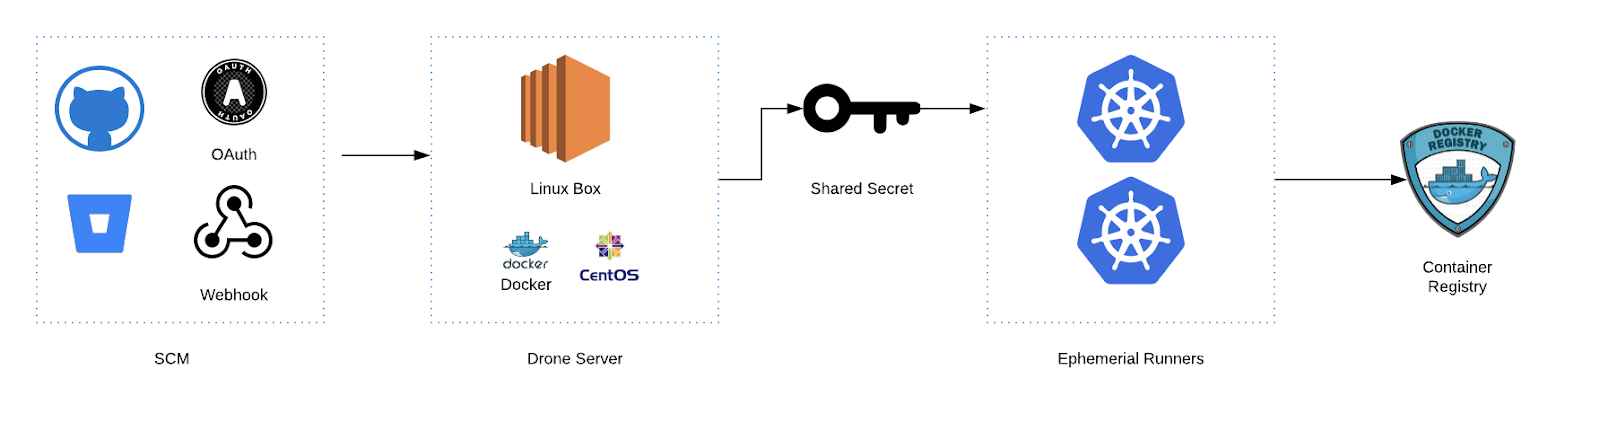
The Drone Server authenticates with your SCM provider and then via a shared secret communicates with the Runners. Wiring up these pieces are pretty simple.
Let’s Get Started
In this example, the moving pieces will be a GitHub Account, a running CentOS machine, a Kubernetes Cluster, and a Docker Hub account. Like always, you can follow along in the blog and/or watch the video. The example GitHub repository can be cloned/forked before this example at https://github.com/ravilach/firstdrone.
Video: https://www.youtube.com/watch?v=kZmOCLCpvmk
GitHub / SCM Prep
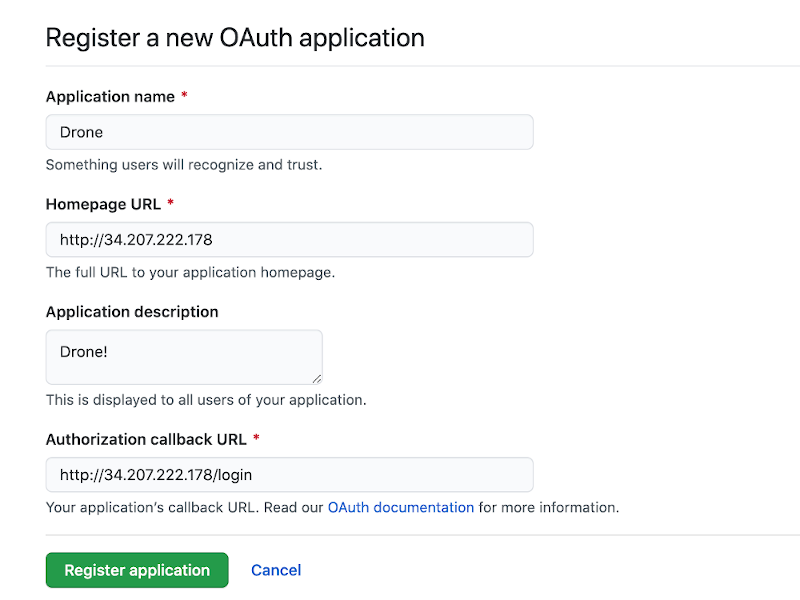
The Drone Server needs to authenticate with your SCM provider. This is accomplished in GitHub by making an OAuth application. This is done by navigating to Settings ➡ Developer settings ➡ OAuth Apps + Register a new application.

When you register a new OAuth application, you will need to have the DNS/IP address of the Drone Server handy. In my case, this is 34.207.222.178. The callback URL has /login appended to the Homepage URL.
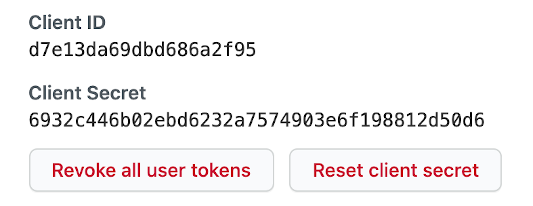
When you register the application, make sure to note the Client ID and Client Secret, which will be needed to wire the Drone Server.
CentOS Drone Prep
Depending on where you get CentOS from, you might have to install Docker Engine. Assuming that you have Docker Engine installed, the only piece of prep you need on the server before installing is to generate the shared secret which will be used for Server to Runner communication. Make sure to copy down the shared secret.
openssl rand -hex 16

Drone Installation
To get Drone on your machine, simply run a Docker Pull on the image.
sudo docker pull drone/drone:1

Once pulled, you can configure the properties for Docker Run. The properties to fill in for barebones are the secrets and server address and protocol. Let’s go ahead and create an admin user. The admin user follows your GitHub username.
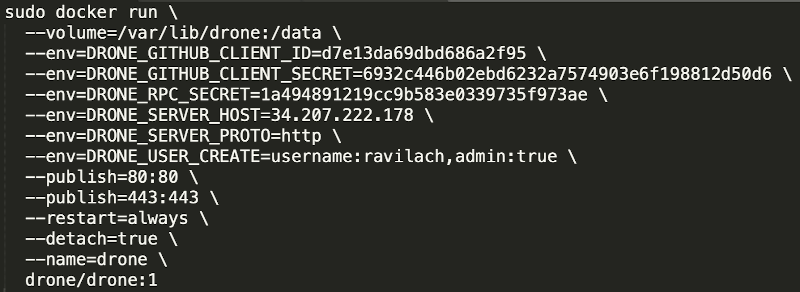
sudo docker run \
  --volume=/var/lib/drone:/data \
  --env=DRONE_GITHUB_CLIENT_ID=yourClientID \
  --env=DRONE_GITHUB_CLIENT_SECRET=yourClientSecret \
  --env=DRONE_RPC_SECRET=yourRPCSecret \
  --env=DRONE_SERVER_HOST=yourIPorDNS \
  --env=DRONE_SERVER_PROTO=http \
  --env=DRONE_USER_CREATE=username:yourGitHubUser,admin:true \
  --publish=80:80 \
  --publish=443:443 \
  --restart=always \
  --detach=true \
  --name=drone \
  drone/drone:1
Drone UI
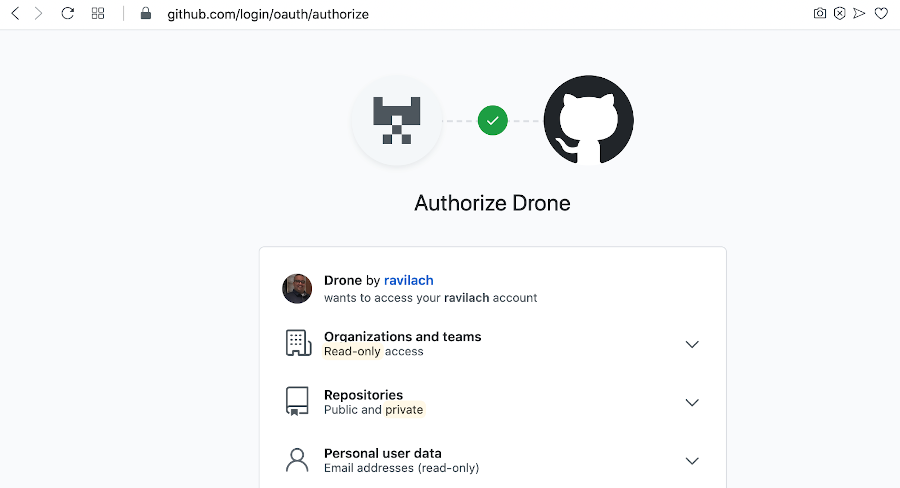
One issuing the Docker Run commands with the properties, you can head to the IP or DNS entry of your Drone server. In my case, navigate to http://34.207.222.178. You will be greeted to authorize your user via GitHub.
Authorize your GitHub Credentials.
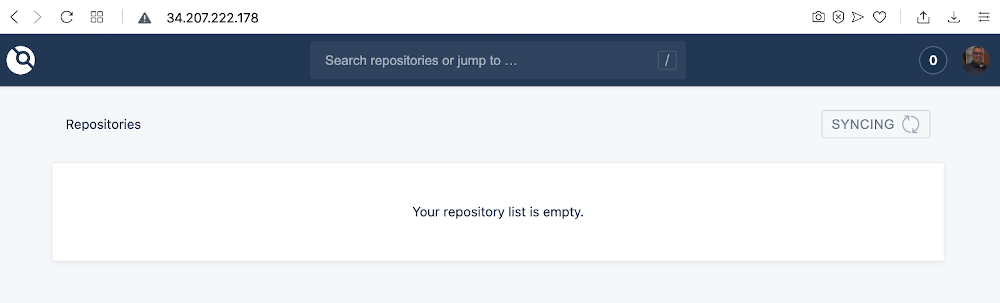
Once Authorized, Drone will build a list of repositories.
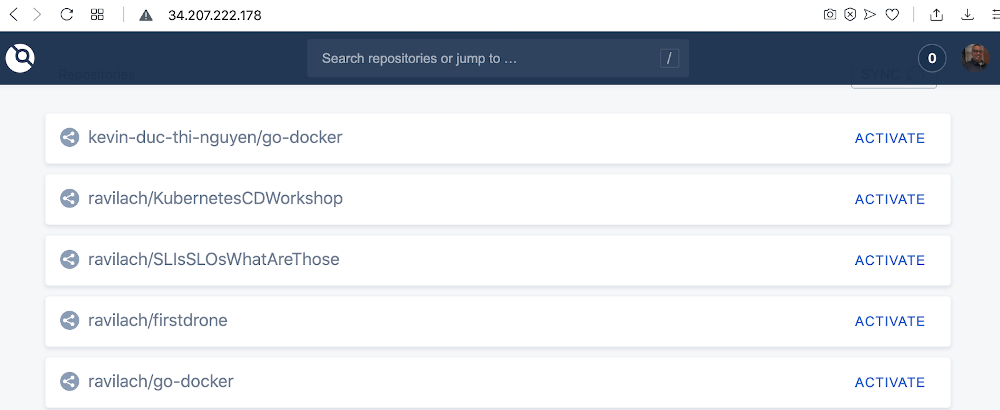
Now you are ready to deploy runners, in this case, Kubernetes.
Kubernetes Cluster Prep
In this example, we will leverage the Kubernetes Runners. For the Kubernetes Runners to request resources on your behalf, a Role Binding is needed as well as the Runner Deployment.
A simple approach is to build out two YAML files, one for the Role and Role Binding and another for the Deployment.
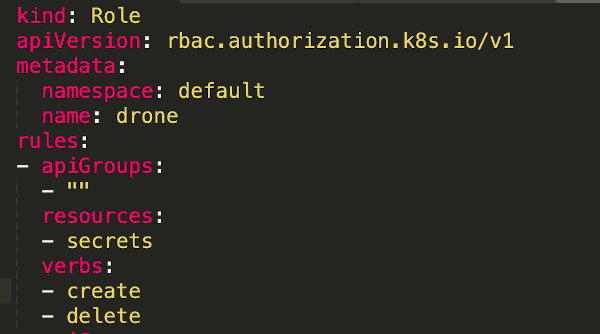
kubectl apply -f drone_role.yaml

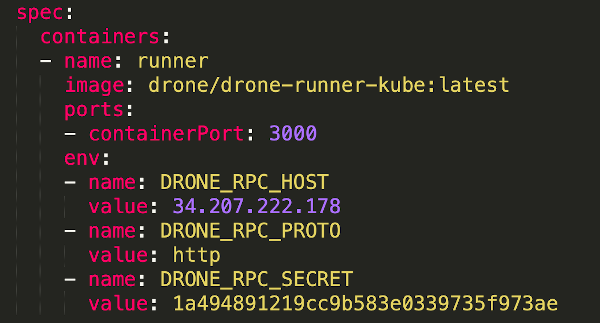
In the Runner Deployment Spec, make sure to update the Drone Server, Shared Secret, and Protocol to match your installation.
When the items are filled in, can deploy the Deployment.
kubectl apply -f drone_deployment.yaml

Optionally you can validate that the Runner is connected to the Server. Get the Pod Name then run a log command.
kubectl get pods –all-namespaces

kubectl logs drone-6564db8f9f-949s2 -c runner

Success! Now would be time to start marching towards your first build.
Marry the CI and SCM Together
Drone leverages Configuration as Code to describe pipelines. Drone can work off of webhook requests from the Source Code Management solution to orchestrate when a new build needs to be kicked off.
Prep the Repository
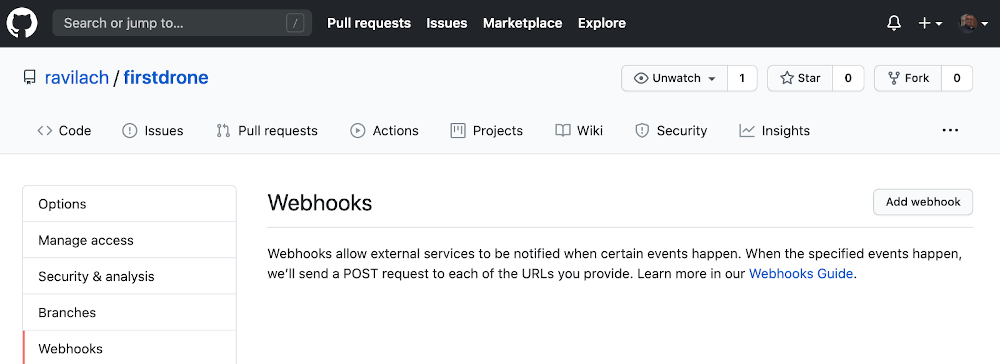
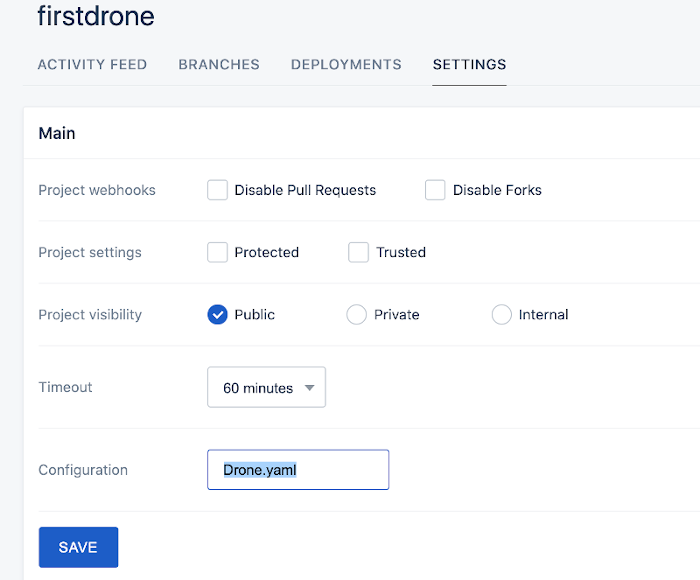
Can leverage the Drone UI to “Activate” the Repository. In my “firstdrone” repository, the webhooks are empty.
In the Drone UI, navigate to your repository of choice and then Active Repository.
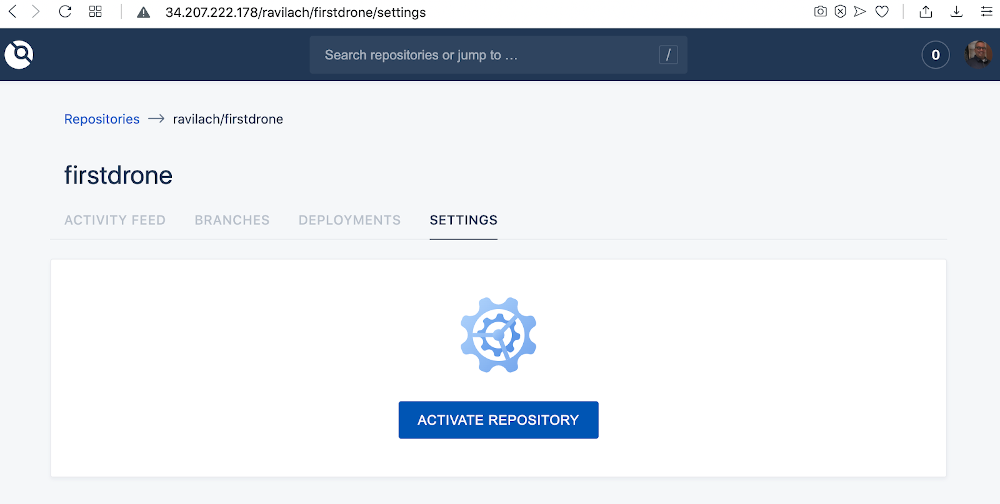
For this example, the defaults are fine for the Repository Activation. The configuration to modify if needed is the name of the Drone Configuration file to monitor. In this example, you will monitor for “Drone.yaml” in the repository.
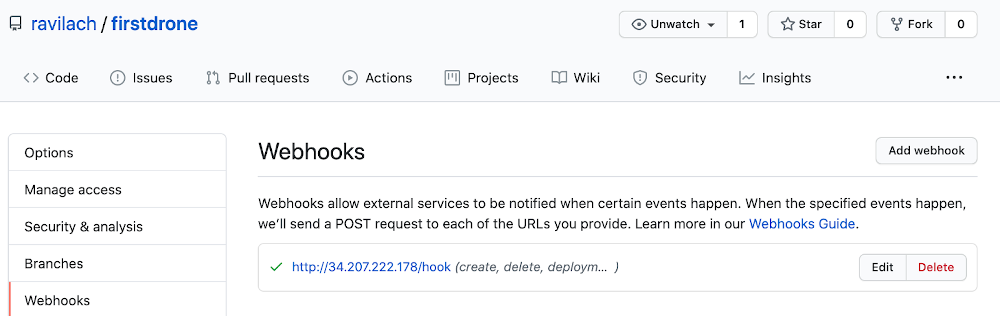
Then you can validate that the webhook has been successfully created in GitHub.
With the CI and SCM wirings out of the way, the next steps are to define your first pipeline and fire off a build.
Your First Drone Project
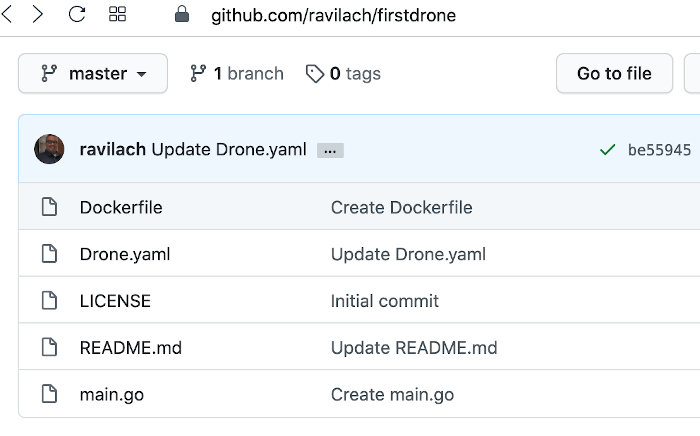
If starting with an empty repository you can leverage a simple example of a project structure or wire together your own project/repository.
If following this example, you wired into Drone to watch out for “Drone.yaml”. Drone’s declarative pipeline format is easy to craft and understand as per the example. In the example pipeline, we leverage the Docker Plugin for the publish setting and will be downloaded automatically during execution time.
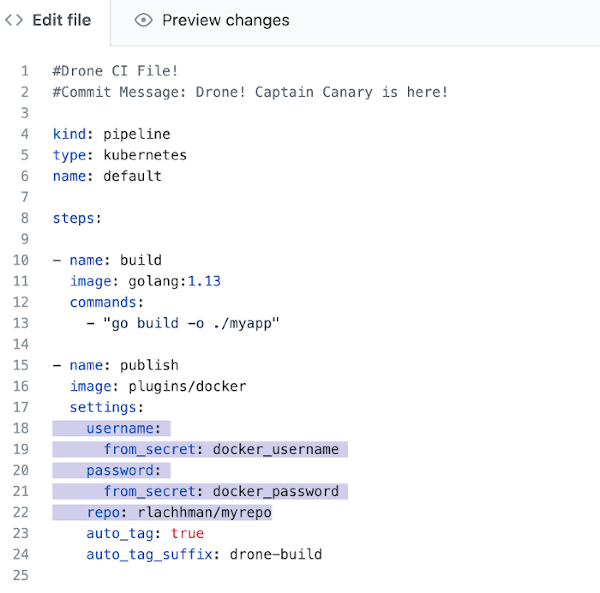
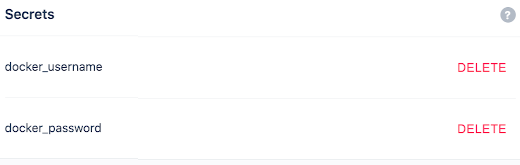
The highlighted lines are leveraging secrets to wire in my Docker Hub credentials. You need to update the repo location to your own and create Drone Secrets to wire in.
Back in the Drone UI, navigate to the repository settings, and add the needed secrets.
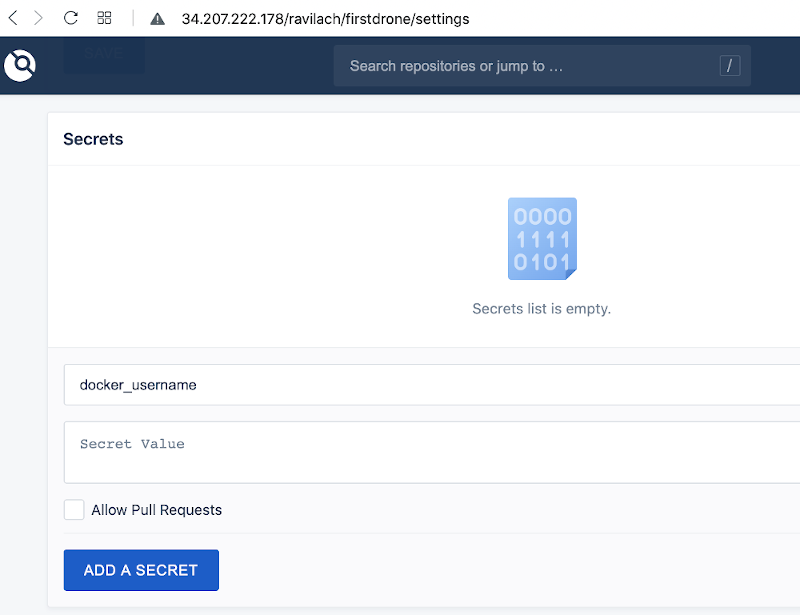
Add the appropriate secrets to match the format of the example.
With those wirings out of the way, you are now ready to kick off your first build and publish it to Docker Hub.
Your First Build and Publish
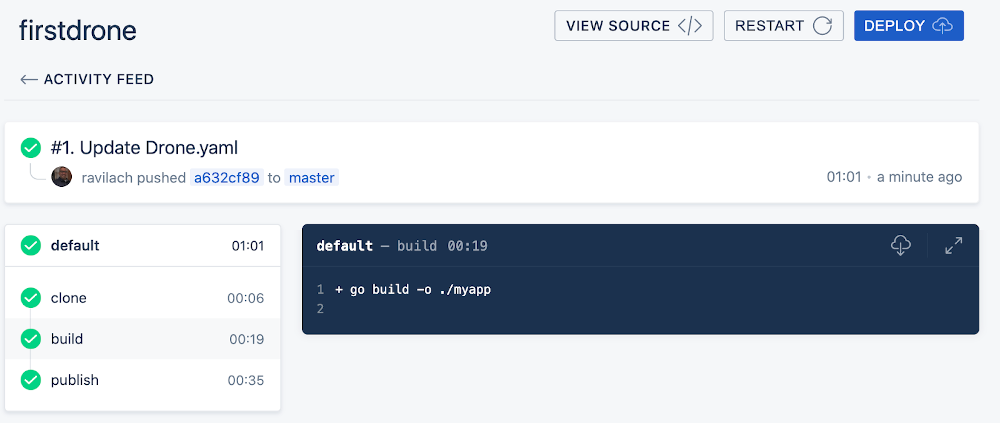
With the wirings out of the way, all that is left is to commit the “Drone.yaml” with some sort of change and you are off to the races.
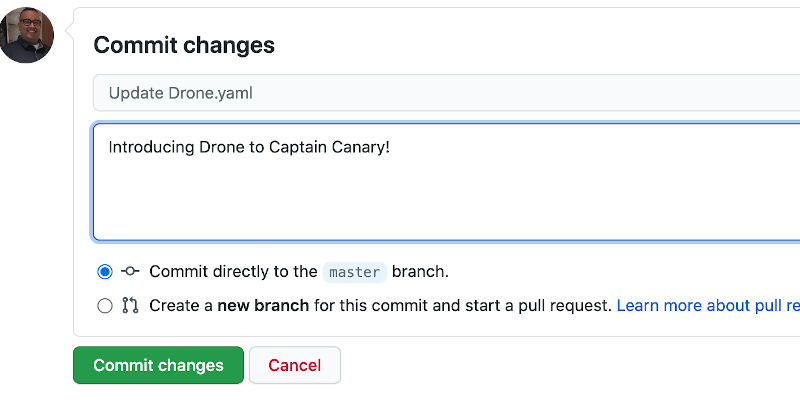
Once you hit Commit changes, the CI magic starts, and your build and publish are off!
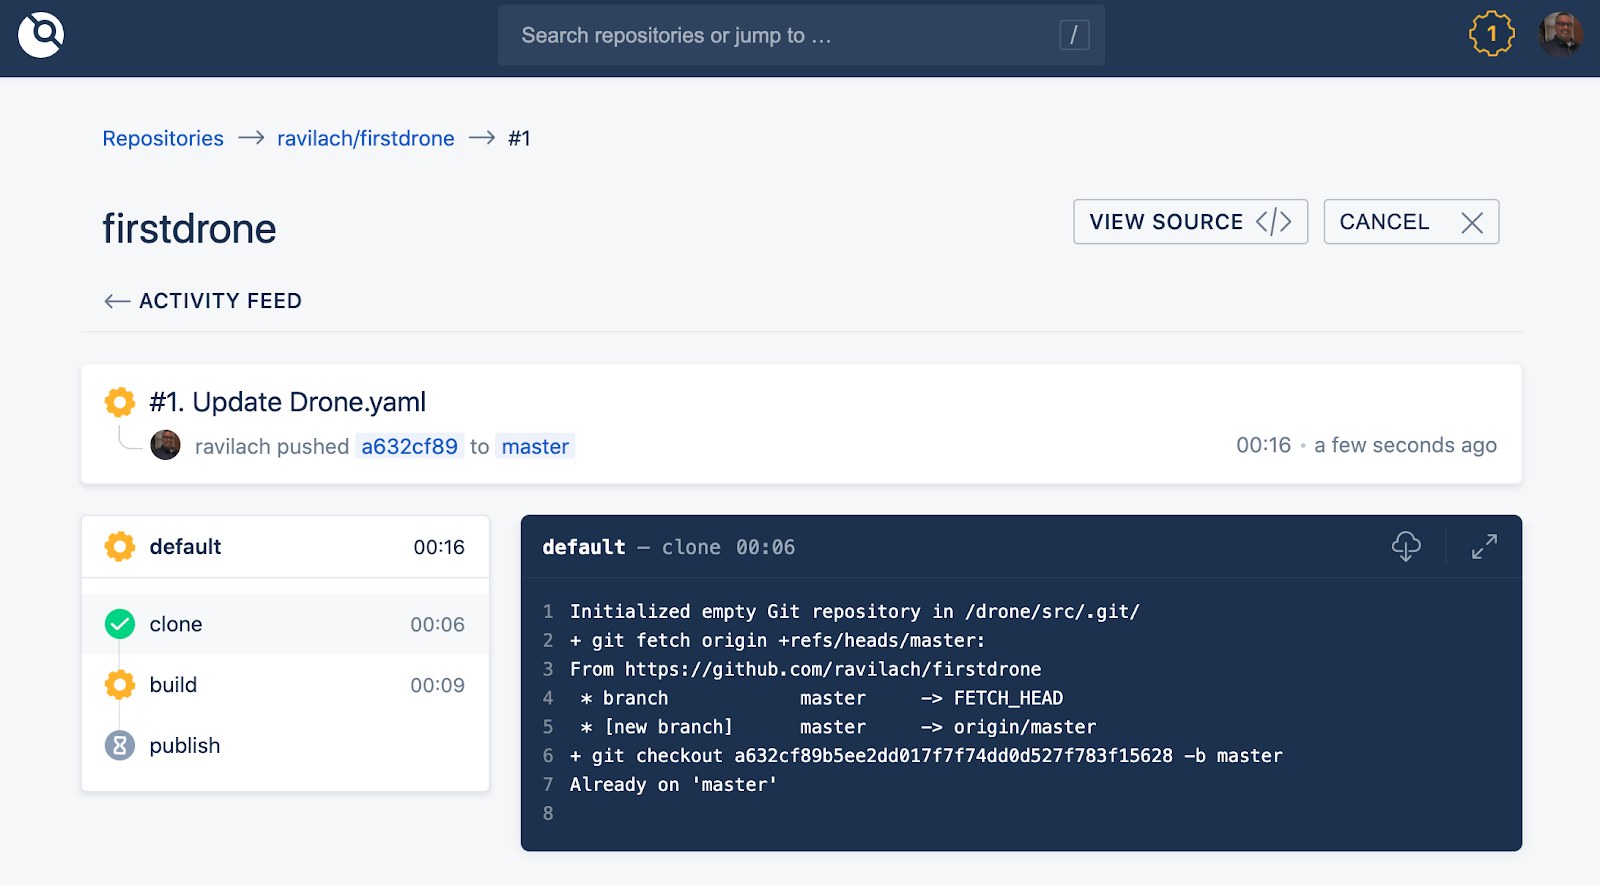
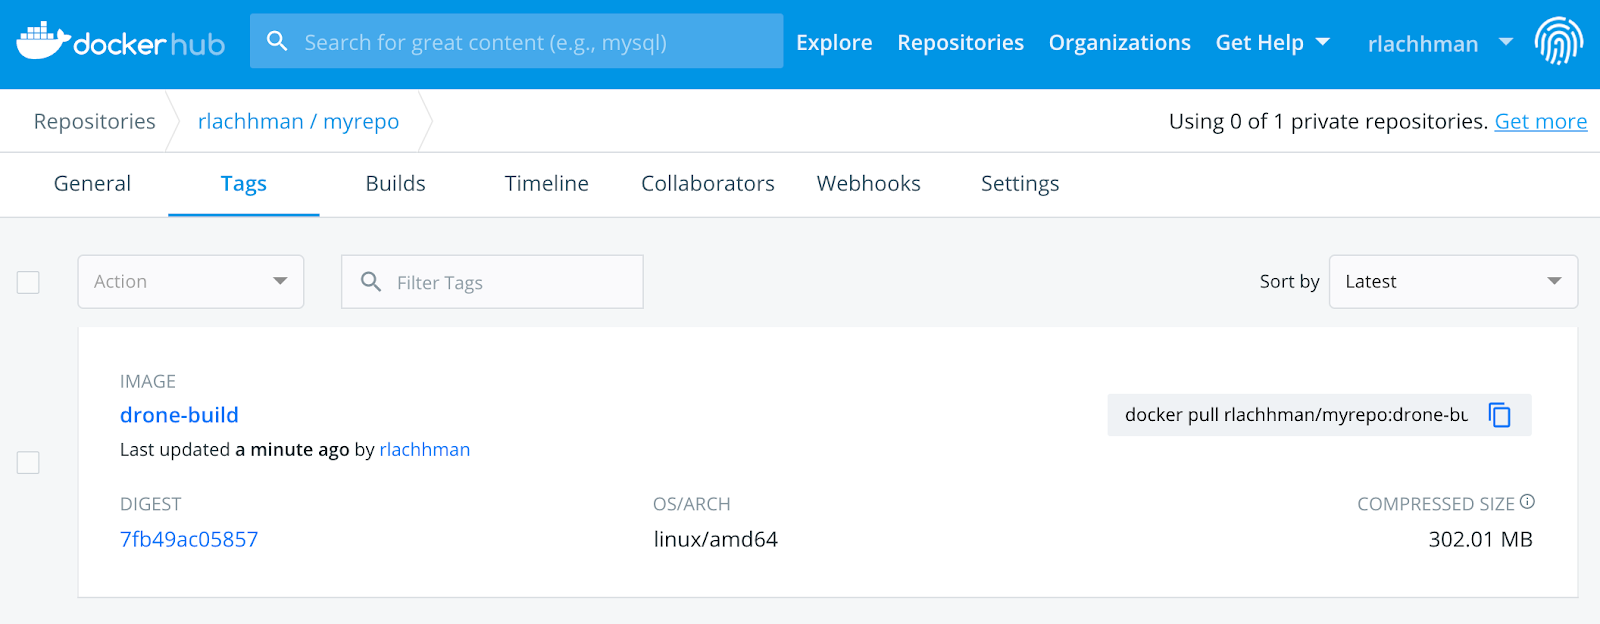
Success! Congratulations on your first Drone build and publish!
Validating success on Docker Hub. Enjoy the spoils of your hard work and don’t forget to check out Drone!