Contributed by Aytunc Beken
Why YAML in the Pipeline?
Pipeline is one of the key components in Jenkins. With its unique features, users can define various flows for their CI/CD’s depending on their requirements. Thanks to the community’s support, new features like this one are continually being added to it, making Jenkins Pipeline one of the most powerful concepts in the DevOps World.
The Pipeline as YAML plugin was created to make it simple for users who are new to Jenkins Pipeline and might not be familiar with its DSL. YAML was chosen because it’s easy to understand, has a well-structured format, and is widely used.
This blog post will explain what the Pipeline as YAML plugin is and how you can utilise it.
How does it work?
Pipeline as YAML plugin works as a converter. In the pipeline runtime, this plugin gets the YAML defined pipeline file and converts it to Jenkins Declarative Syntax. This conversion happens after cloning a repository or getting the script from Editor and before running the pipeline.
After conversion, the Pipeline injects the newly created Declarative Syntax format into the pipeline runtime.
This conversion enables the use of predefined steps/options/triggers/etc. in the pipelines. There is no additional coding required.
Supported Features
With the latest version of Pipeline as YAML plugin, users can:
Use this plugin in:
- MultiBranch Pipeline Job
- Pipeline Job (from SCM)
- Pipeline Job (in Editor)
Declare the directives below:
- agent
- post
- stages/sequential stages/parallel stages
- steps/script
- environment
- options
- parameters
- triggers
- tools
- input
- when
- library
The latest version of the YAML plugin comes with Pipeline Converter and validator. Users can convert YAML formatted pipelines into Declarative Syntax and validate it before running the actual pipeline, preventing failures.
Documentation
You’ll find all documentation for the Pipeline as YAML Plugin in its GitHub repository. This includes use-case examples with screenshots and all possible declaration examples for Jenkins Pipeline Directives.
How do I install it?
To install Pipeline As YAML plugin, use the Plugin Manager as you normally would.
Note: Installing pipelines does not require a restart.

How do I use it?
Here’s a simple example of where we clone and build a Maven project. (Further examples can be found on the plugin’s GitHub page.)
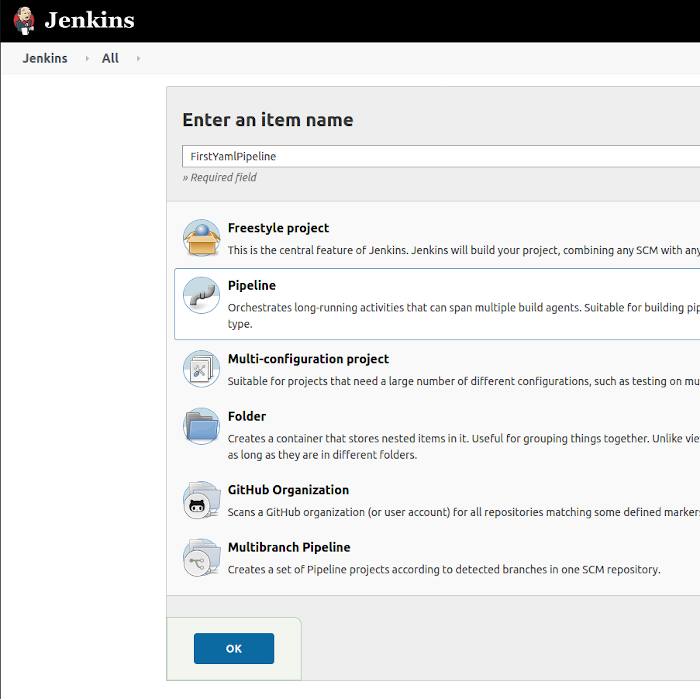
1. First, create a new Pipeline Job.

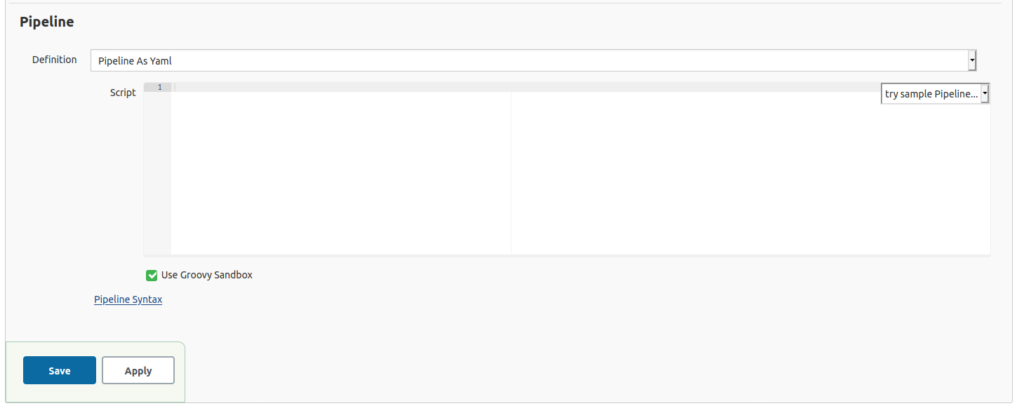
2. In the Job configuration page, select “Pipeline As Yaml” from the dropbox as shown below.

3. Copy the YAML below and paste it in the editor.
pipeline:
 # Define Agent. Master will be used for this pipeline
 agent:
   label: 'master'
 # Define tool for Maven. This tool must be defined in Jenkins configuration
 tools:
   maven: default
 # Defines stages
 stages:
   # Define checkout stage
   - stage: Checkout
     # Define steps
     steps:
       # Use any step from Pipeline Syntax Page. 'git' steps is used for checkout
       - git 'https://github.com/aytuncbeken/pipeline-as-yaml-tutorials.git'
   # Define Maven Stage
   - stage: Maven
     # Define Sequential Staget
     stages:
       - stage: Build
         steps:
           # Use 'sh' step for running maven commands
           - sh 'mvn clean compile'
       - stage: Test
         steps:
           # Use script as well
           script:
             - sh "mvn clean test"
 # Define post actions
 post:
   always:
     - cleanWs()
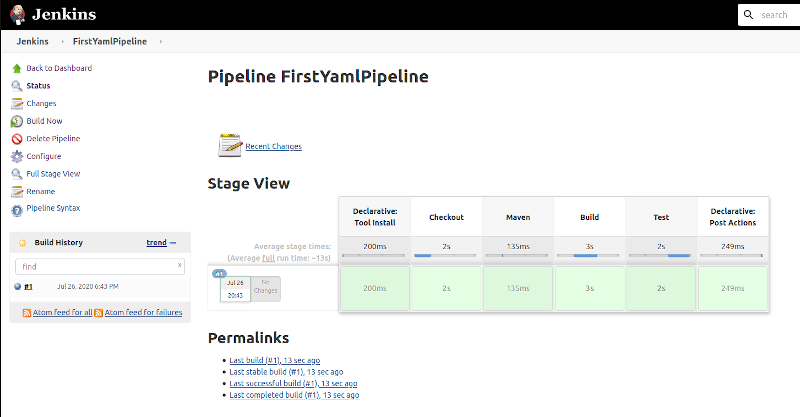
4. Save the job and run it.
Conclusion
If you’d like to learn more about the Pipeline as YAML plugin, watch the recording of this online Meetup: Pipeline as YAML Plugin Introduction. The presentation slides are available here.
